If you’re anything like us, you get a thrill from specialty techniques like foil, die cuts, and unique paper stocks used in beautifully printed pieces. We tend to geek out even more when we get a glimpse of the process behind the piece. In that spirit, here’s a look at one of our most recent labors of love that was a true honor to produce.
The Greeting Card Association (of which we are proud members) looked to us to produce their annual invitation to the 2026 Louie Awards. With resources donated by other GCA members (including design, paper, and envelopes), we set out to produce a piece that would knock the socks off some of the most ardent lovers of specialty print—greeting card designers and stationers. Knowing this audience would truly appreciate every last detail incorporated into the card, and also realizing our own wider audience might be just as intrigued, we present to you the step by step process of how we achieved this remarkable piece.
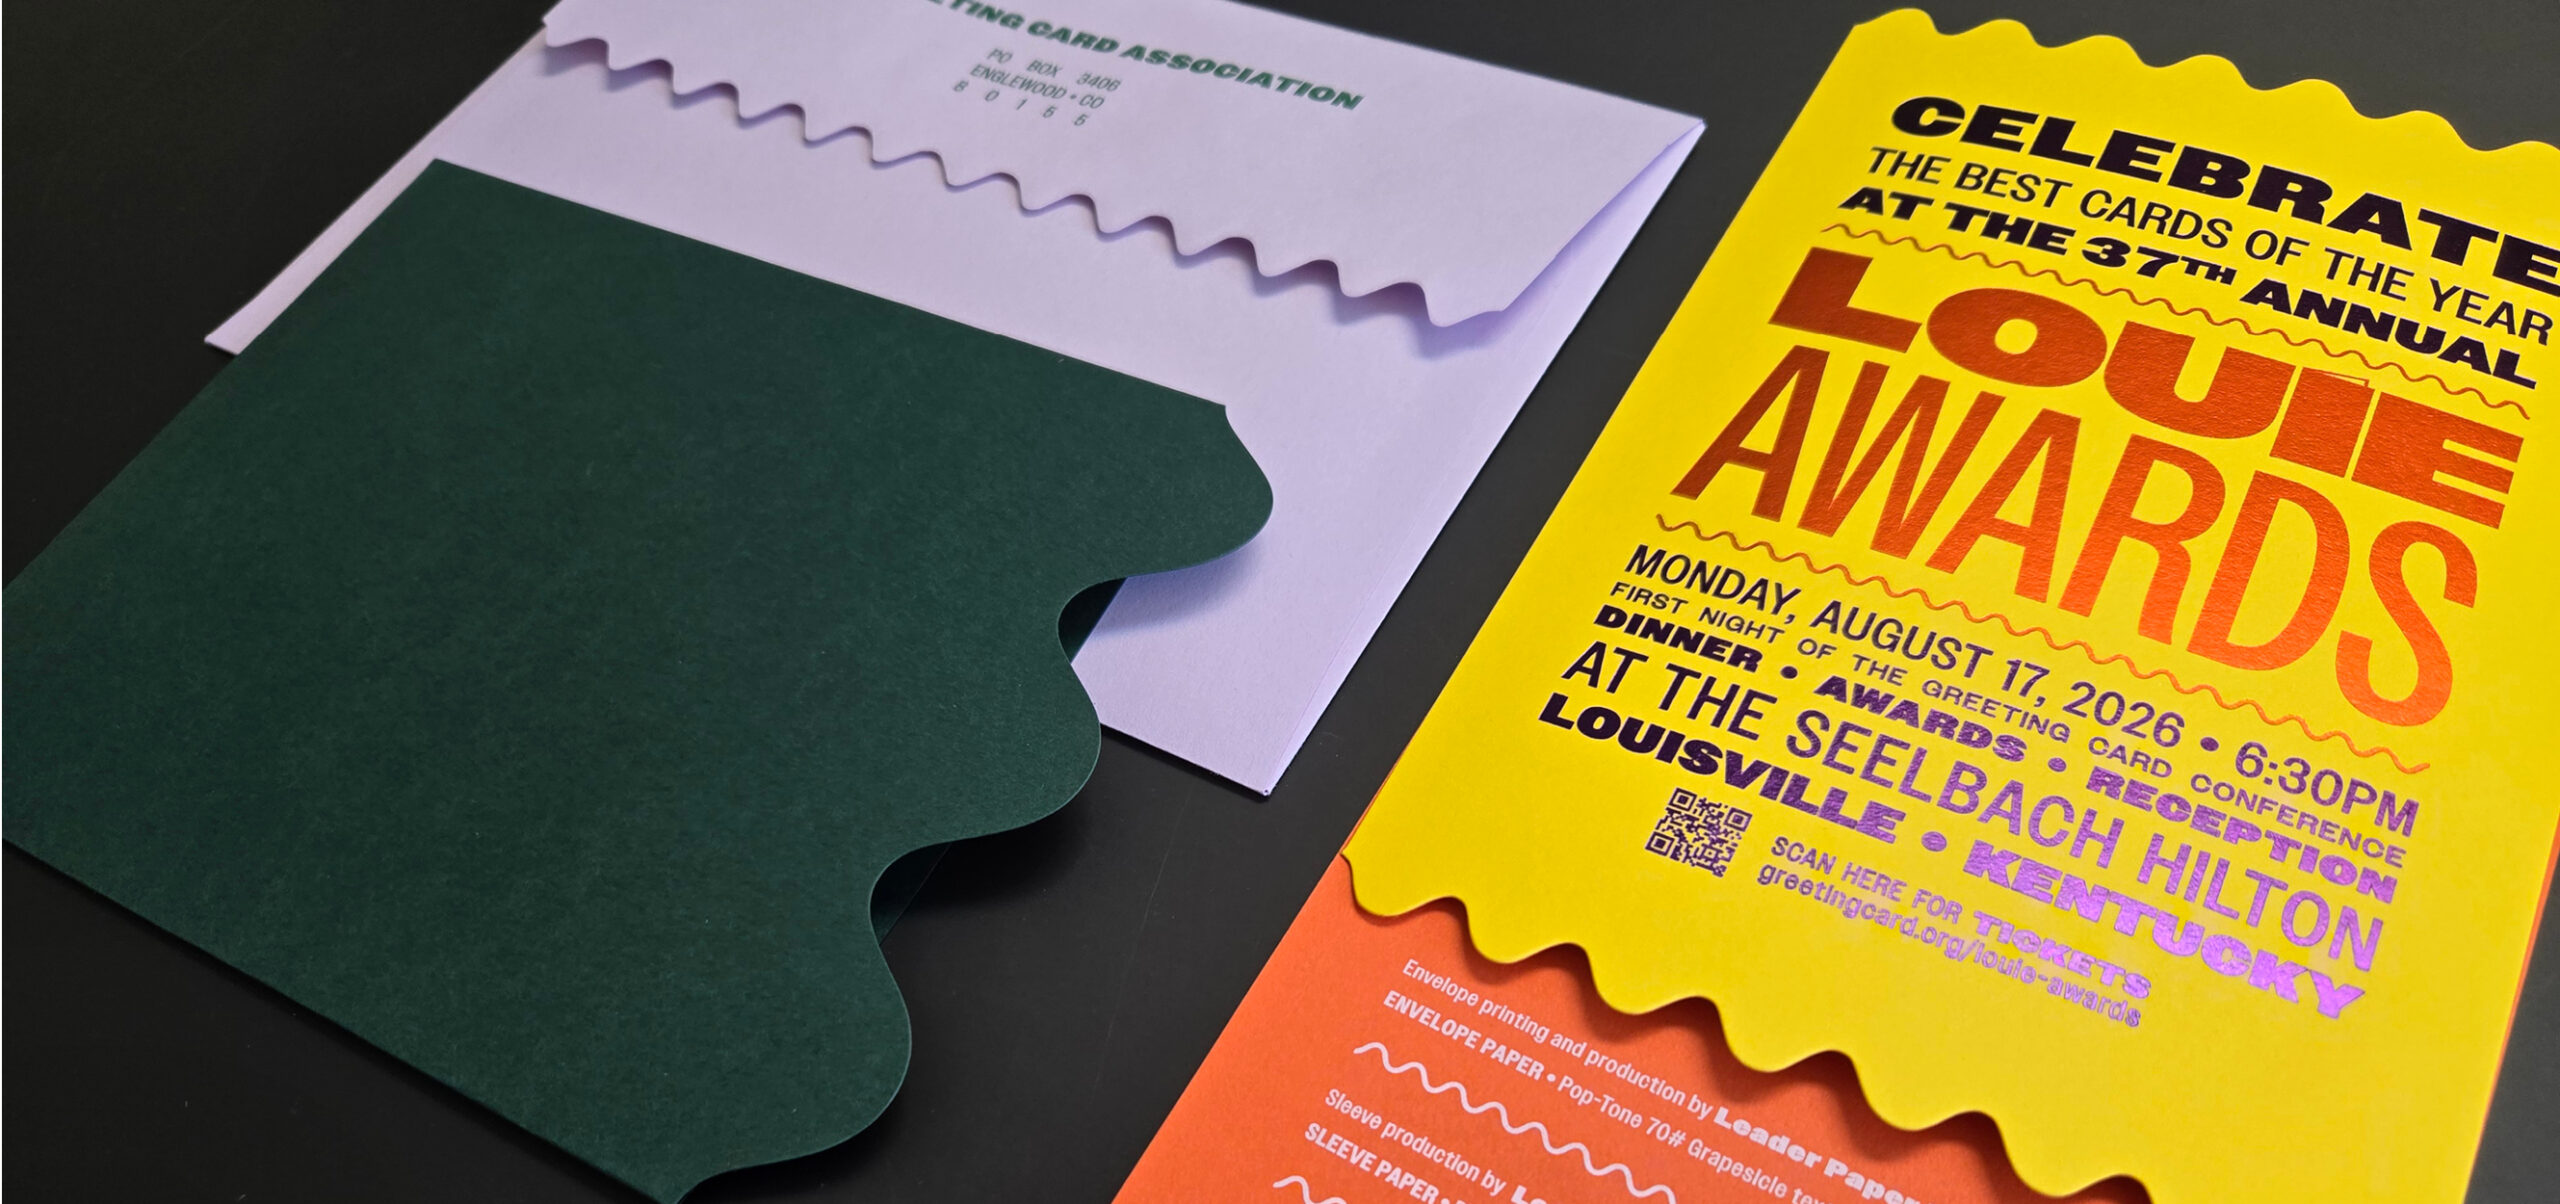
STEP 1: Create the Concept and Design
(Design by Bromstad Printing Co.)

STEP 2: Print White Ink on Orange Paper

STEP 3: Create the Copper Dies for Hot Foil Stamping
(Dies provided by Universal Engraving, Inc.)

STEP 4: Foil Stamp Red and Purple Foil on the Yellow Paper
(Foil provided by Infinity Foils, Inc.)

STEP 5: Duplex the orange and yellow sheets together.
Let them dry overnight (in a large stack so they lay flat)

STEP 6: Die cut the Invitation

STEP 7: Print Envelopes (and keep in order for postal discount!)
(Envelopes provided by Leader Paper Products )

STEP 8: Assemble invites into die cut sleeves
(Sleeves provided by Leader Paper Products)

STEP 9: Stuff completed invites into Envelopes, seal and Mail.

Good luck to all entrants at this year’s GCA Louie Awards! (But if you ask us, anyone that received one of these in the mail got a win already) 😉